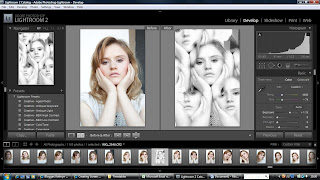
Last week we looked at Lightroom briefly on the projector screen, today we got the opportunity to log in to a mac computer and try to manipulate a photo ourselves.
We learn't some handy shortcuts for when using Lightroom, which should make things easier and quicker when processing a lot of images, the shortcuts are below:
- To hide the dock (on a Mac)- Press Alt, Command & D
- To put LR in full screen mode- Press F key. This is similar to the above on a PC.
- Turning off the side bars- Press the small arrow at the side of the screen, each one turns off the corresponding bar. The tab key turns all bars off at once, pressing it again makes them re-appear.
- To dim/ turn off the lights- Press the L key once to dim the background, then press again to black it out so all you see is the photo you are looking at, this makes it easier to look at an image.
Views
- Grid - Press G (multiple image view)
- Loupe - Press E (single image view)
- Compare - Press C (two images side by side)
- Survey - Press N (single image view- slightly different to Loupe)
- A useful tool is to select two images whilst pressing the shift key, then Press C to get Compare View and the two images will be displayed side by side- this is very handy when comparing two images that are slightly different.
- Zoom in/out- Press Z
- When in develop mode making adjustments to an image, press Y and LR will display the original image also, this way you can see clearly how the changes you have made have effected the image, and hopefully how much you have improved the image compared to the original.

Adjustments
- When using the adjustment brush- the brackets (the ones near the enter key on a laptop/pc) change the size of the brush
- To remove spots and make skin appear smoother, reducing the clarity when using the adjustment brush is a good way to do this.
Exporting Images
Exporting images is when you can re-size and covert the images amongst other things.
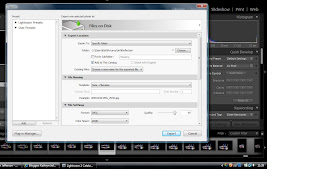
Press File then Export and it brings up this window:

-When clicking Files on Disk- the bar at the top of this window you can choose to save the exported images to either the hard drive or a CD or DVD. If choosing to save to the computer hard drive you can then choose where exactly to save it to and the name of the file.
-You can change the format of the images to one of the following compressed formats:
JPEG- this is known as 'lossy' compression as it crunches and compacts the data everytime you save which reduces the tonal range and definition.
TIFF & PSD- known as loss-less compression.
DNG- this is a RAW format.
- The quality bar ranging from 0 to 100 controls the amount of compression.
Re-Sizing Images
Click on the tick box saying resize to fit and then you can select how to size your images, a good way of doing it is by selecting Longest Edge which is as it sounds and sizes the images longest edge to the dimensions you set.
Useful dimensions for screen and print are:
Screen
Select Longest Edge- 900 Pixels- 72 PPI (Pixels per Inch)
This is a reasonable size for viewing images on the screen and they dont need to be bigger than this, the screen has a resolution of 72 PPI so it is pointless making the image any bigger than this.
Printing
Select Width and Height- 15 by 10 Inch- 300 PPI
The human eye cant really see much more than 240 PPI.
One of the options further down the screen is to minimize embedded Metadata, this is not wise as it forms part of the protection of the image as it holds the photgorapher's name etc.
After selecting the settings needed simply press Export.
We then opened up our image in Photoshop and John gave us a brief introduction.
Photoshop is a Destructive software if used incorrectly when an image is saved you cant go back. As opposed to Lightroom which is non- destructive software.
A few useful tools-
The hand tool is used for burning in and adding exposure.
The F key changes the background.
The most frequent tools we will use are found when you press Image then Adjustments.
0 comments:
Post a Comment