Today we looked at Lightroom version 2 on the projector whilst John talked through some of its important and useful functions.
Lightroom is known as Digital Asset Management software, other examples of this would be Apple Mac's Aperture and Canon's DPP (Digital photo professional)- which i have tried out as i use canon, mainly i used this for the remote shooting funtion to practice setting my camera and get used to its funtions, i found this very helpful but didnt particularly like the rest of the software for ease of use.
Lightroom is used for Global Adjustments, it mostly edits the whole image.
Photoshop is used for Global and Local Adjustments.
There are 3 main overall functions in Lightroom:
Library used for organisation- (IN)
Develop used for manipulation- (MANIPULATE)
Slideshow,Print and Web used for exporting- (OUT)
- It processes RAW files very fast
- Try to back up files at least once a month to prevent loss of work.
- When first using Lightroom go to Edit then Catalogue Settings and set the preview quality to High.
- When importing photos from Lightroom to help with organisation make a folder called Camera Originals and save all images here- this then saves a copy of the RAW images which acts as a backup to Lightroom.
Useful shortcut's
-Tab key- this minimises all of the function windows.
-Pressing L- dims the lights, press several times for a black screen around the image and again to return to the normal screen.
-Right click and image and go to Virtual Copy- this creates an exact copy.
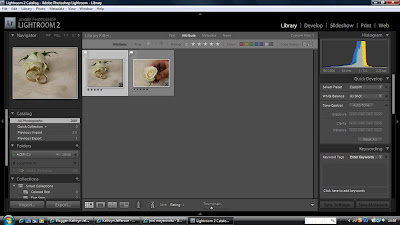
- selecting the star rating on an image can help seperate images into groups, for example if you select 5 stars on the rating on the image, then click on attribute and 5 stars and all of the images with a 5star rating will come up on the screen, see example below:

When in Library you can also flag and colour code images. Right click the flag on the image and select reject, this is useful when you have done a shoot and you are asked specifically not to use certain images- you can reject them using this function.
You can also quickly and easily rotate the images, this is much quicker than in most other software.
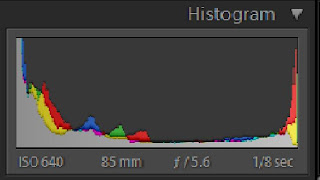
We looked at the Histogram, this is the desciption of the tonal range, from left to right it depicts the Shadows, Midtones and Highlights in the image, John advised we should "always shoot to the right", this means that we should be aiming to fill get more information on the right side of the histogram, usually students tend to have a lot of detail in the shadows and midtone section, he also suggested we start using the histogram on the image preview on our camera's LCD screen as this allows us to start learning more about what a properly exposed image is.
Clipping- is when the histogram appears to run off the edge- we should try to avoid this.

This is an example of a histogram showing clipping.
There are three parts in a histogram and the far right section takes 2 thirds of the camera's sensor and ability to record so to make use of this "shoot to the right".
Keywords- these are useful for corporate and editorial Photography.
Presets
Download new ones- type into google to download new presets and save into my copy of lightroom, such as- brighten eyes.
Clone Tool
This gets rid of unwanted things and can be used to 'airbrush' images and edit out spots and flaws in the skin. If you have a lot of very similar photos and want to edit the same thing out of all of them you can edit this then synchronise to apply to the other images.
To change the size of the brush use the brackets.
Another way to 'airbrush' is to use the orange in luminance to help reduce the appearance of spots and freckles.
Graduated Filter
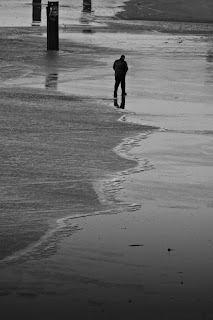
The graduated filter is underneath the Histogram and can be used to create an area of graduation in an image this can be done by using a variety of functions including exposure which you select from the drop down box, when dragging the filter over the image press shift to keep the lines straight. Below is an example of an image that has had a graduated filter applied to it, and below that is the original image.

F16, 1/100 Sec, ISO 2400, handheld, edited in LR converting B&W and using a graduated filter.
This tool is useful as it draws the eye into the image.

0 comments:
Post a Comment